


Chevy Discount YITAMOTOR® 2003-2007 Chevy Silverado Headlight Assembly Black Housing Amber Side + Bumper Headlights Lamps

free shipping
on all orders
30 days
money back
lowest price
guarantee
safe shopping
guarantee
Product Description
Headlights are fundamental to driving and they are a part of the safety circle that actually helps prevent accidents. When getting close to the end of their lives, headlamps shine less brightly, it's quite distracting if one of your headlamps is brighter than the other, and it certainly won't reflect road markings and traffic signs very well. YITAMOTOR high-quality headlights will let all of the light through, allowing your headlights to work the way they were originally made to.
Fitment
- 2003-2006 Chevy Silverado 1500/2500/3500/1500 HD/2500 HD Pickup
- 2007 Chevy Silverado 1500/1500 HD/2500 HD/3500 Classic Body Pickup Only
- 2003-2006 Chevy Avalanche 1500/2500 Pickup (Without Body Cladding)
- Professional installation would be highly recommended
Features
- Sturdy and Durable
- Plug&Play Installation
- Guaranteed Quality
- Product Compliance
All headlamp assemblies are manufactured while adhering to strict DOT and SAE safety standards required of OEM manufacturers.

California Residents: Prop 65 Warning
WARNING: Cancer and Reproductive Harm
Visit:www.p65warnings.ca.gov
Specifications
| Brand | YITAMOTOR |
| Certifications | DOT, SAE |
| Material | ABS Plastic Housing / Polycarbonate Lens |
| Housing Color | Black |
| Lens Color | Clear |
| Reflector | Amber |
| High Beam Bulb Type | 9005/HB3 LED Bulbs(Bulbs Not Included) |
| Low Beam Bulb Type | 9006/HB4 LED Bulbs(Bulbs Not Included) |
| Parts link | GM2502224, GM2503224 |
| OEM Part Number | 15199556,15199557,10366037,10366038 |
| Manufacturer Part Number | DWHA0036 |
| Package included | 1 pair of headlights Housing(Driver&Passenger Side) |
| Warranty | 1 Year |
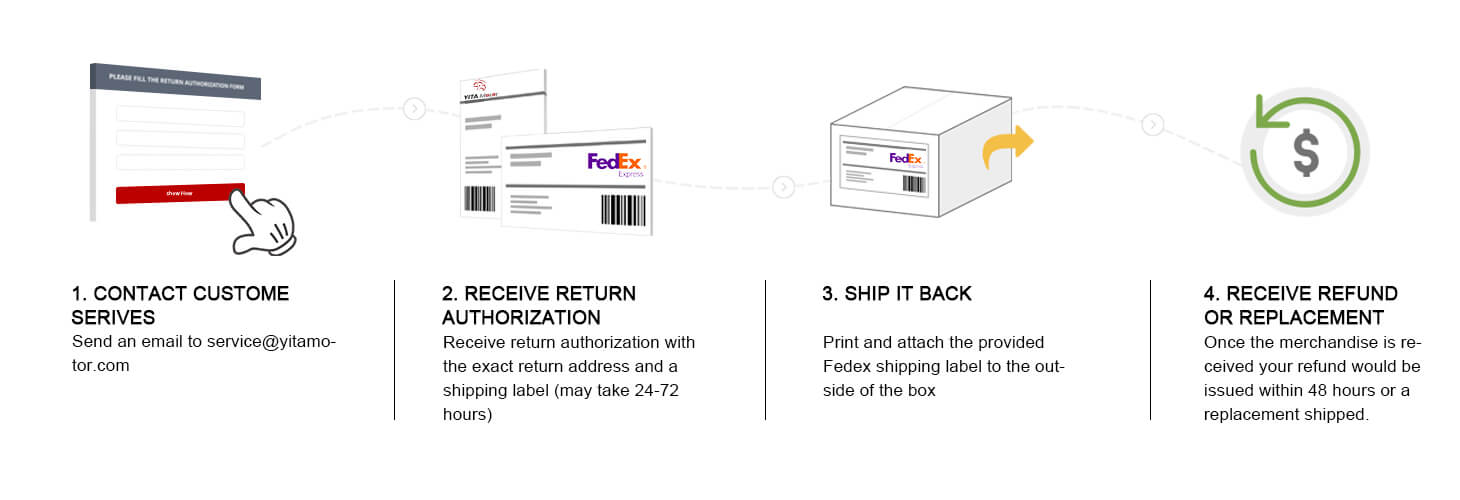
Easy Return
At YITAMOTOR, Your order means a lot to us, Feel free to contact us if you have any questions.
Not satisfied with it? We offer returns for products in new/unused condition within 30 days of delivery for a refund or exchange.
Returns or Exchanges items in 4 easy steps, and Appointment FedEx pickup service for you, hope you enjoy our safe and worry-free after-sales service.
Shipping
1. Item processing time

Note:
1. It may be delayed during holidays, such as Black Friday, Christmas, New Year, etc. Or under special weather conditions.
2. We will ship your item only by FEDEX, Please do not leave PO.BOX address.
Product Description
Headlights are fundamental to driving and they are a part of the safety circle that actually helps prevent accidents. When getting close to the end of their lives, headlamps shine less brightly, it's quite distracting if one of your headlamps is brighter than the other, and it certainly won't reflect road markings and traffic signs very well. YITAMOTOR high-quality headlights will let all of the light through, allowing your headlights to work the way they were originally made to.
Fitment
- 2003-2006 Chevy Silverado 1500/2500/3500/1500 HD/2500 HD Pickup
- 2007 Chevy Silverado 1500/1500 HD/2500 HD/3500 Classic Body Pickup Only
- 2003-2006 Chevy Avalanche 1500/2500 Pickup (Without Body Cladding)
- Professional installation would be highly recommended
Features
- Sturdy and Durable
- Plug&Play Installation
- Guaranteed Quality
- Product Compliance
All headlamp assemblies are manufactured while adhering to strict DOT and SAE safety standards required of OEM manufacturers.
California Residents: Prop 65 Warning
WARNING: Cancer and Reproductive Harm
Visit:www.p65warnings.ca.gov
Specifications
| Brand | YITAMOTOR |
| Certifications | DOT, SAE |
| Material | ABS Plastic Housing / Polycarbonate Lens |
| Housing Color | Black |
| Lens Color | Clear |
| Reflector | Amber |
| High Beam Bulb Type | 9005/HB3 LED Bulbs(Bulbs Not Included) |
| Low Beam Bulb Type | 9006/HB4 LED Bulbs(Bulbs Not Included) |
| Parts link | GM2502224, GM2503224 |
| OEM Part Number | 15199556,15199557,10366037,10366038 |
| Manufacturer Part Number | DWHA0036 |
| Package included | 1 pair of headlights Housing(Driver&Passenger Side) |
| Warranty | 1 Year |
Easy Return
At YITAMOTOR, Your order means a lot to us, Feel free to contact us if you have any questions.
Not satisfied with it? We offer returns for products in new/unused condition within 30 days of delivery for a refund or exchange.
Returns or Exchanges items in 4 easy steps, and Appointment FedEx pickup service for you, hope you enjoy our safe and worry-free after-sales service.
Shipping
1. Item processing time
Note:
1. It may be delayed during holidays, such as Black Friday, Christmas, New Year, etc. Or under special weather conditions.
2. We will ship your item only by FEDEX, Please do not leave PO.BOX address.
-
I am looking for a new Headlight assembly for the left and right front for a 2007 Chevrolet 1500 Classic. I would also like to ask if you ship to Canada.
Sorry. We do not ship to Canada.
-
I am looking for a new Headlight assembly for the left and right front for a 2007 Chevrolet 1500 Classic. I would also like to ask if you ship to Canada.
Sorry. We do not ship to Canada.
